
Oh, the daunting process of moving into a new place. The boxes and packing, the “be careful with that!” to the movers, and bribes of pizza and beer to friends who you coerce into helping. But then you’re in the new place. And you’re getting settled, and perhaps what you find even more overwhelming is the conundrum of making the space feel like home; it’s a delicate balance of not waiting too long to get everything (because how many dinners can you really have eating above cardboard boxes?), and not rushing to fill the space (because you end up choosing the wrong pieces, and lord knows that teal armoire was never a good idea – even when it was on sale!). But, fret not, because there are little things you can do, furniture aside, that start to give your space that je ne sais quoi – your thumbprint that says: “Welcome to my humble abode.” We connected with the founder of Minted, Mariam Naficy, to get some tips on arranging your art ever so strategically so that your home becomes a bit of a gallery – to showcase personal pieces and artsy finds in a way that has Trad Home ringing you the very next day. Thanks Mariam!
FROM MARIAM:
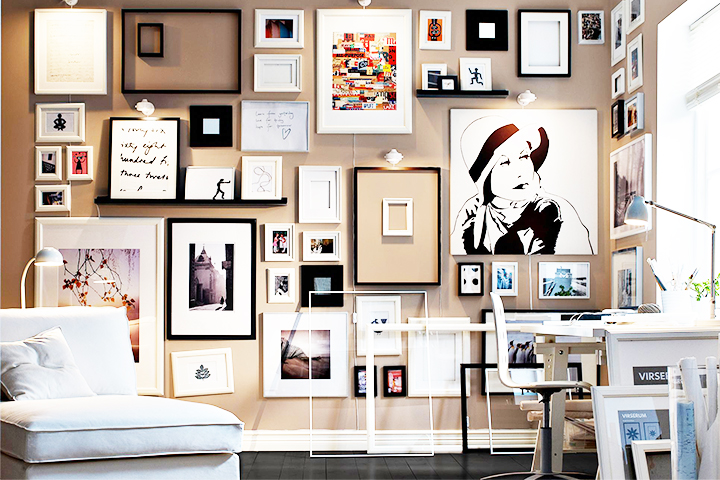
- Map it out.
- Vary the sizes.
- Blend in your personal photographs.
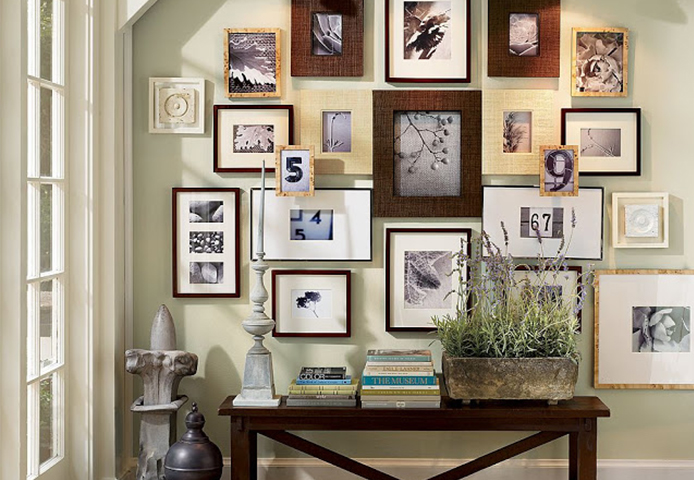
- Balance the colors.
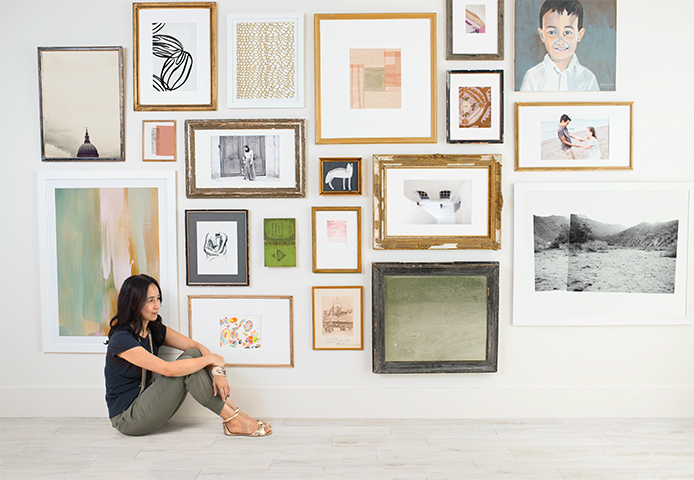
- Mix vintage with the new.
- Use three dimensional pieces to create variety.
- Take your time.
Before you do anything, cut up pieces of paper—large and small—and block out the wall before you start hanging anything. You’re going to have to do a lot of rearranging until it’s perfect because it’s like fitting together a big puzzle.
To make your wall look interesting, it’s important that you’re not afraid to have pieces with a wide size variety. Put a large piece next to a very small piece and visa versa—and don’t be afraid to mix up vertical and horizontal pieces either.
It’s important to add something personal to your own gallery wall, so it’s great to add your own personal or family photographs to the wall. My suggestion, however, is to find photographs that are more artistic rather than with everyone smiling at the camera—photos taken from a distance or a candid picture. And with that being said, make sure your photos are next to more traditional art—don’t put photographs next to photographs. Make sure to vary the medium.
Look for pieces that have a signature color in one piece and try to balance it with other pieces that have that same color somewhere in the artwork. Think of it as though you have a color scheme. It’s also important to balance out the light and the dark—you need a darker piece to anchor the wall, so make sure if you’re going too light, you add in some black in there as well.
It’s not only important to mix modern art and photos with vintage pieces, but I also think that if you have a contemporary medium, like a photograph, you frame it with something vintage. Or, if you have a vintage medium, like an oil painting, put it with a more modern frame as a counterpoint. I love finding antique frames at flea markets, but if you can’t find any that you love, you can always use new frames that have an antique or worn finish, like our farmhouse frame.
Adding two or three non-art items—like a mirror or other personal objects—is critical in breaking up the wall. On my wall, I have a cookbook that I stuck on the wall with strong adhesive. I also just bought a series of paintbrushes at a flea market in Paris that I’m going to add to my personal gallery.
Rome wasn’t built in a day, and neither will your gallery. Start with pieces you already own and love—including your personal photograph—and go from there. You’ll also need some filler pieces just to make sure the puzzle all fits together in a balanced, beautiful way. Find some inexpensive artwork in the color scheme that you love and it’ll blend perfectly into the wall—and no one will ever know it’s just there to take up some space.

Images courtesy of: Minted, Elle Decor, Domaine Home